What Is Knurling?
Knurling is a manufacturing process, typically conducted on a lathe, whereby a pattern of straight, angled or crossed lines is rolled into the material. Knurling can also refer to material that has a knurled pattern.
Knurling is a machining process used in manufacturing to create a textured pattern on the surface of a workpiece, typically made of metal.
It serves three basic purposes: provide a grip area on handhold regions of parts such as thumbwheels and handles as a functional grip improver and user indicator, impose a decorative finish on parts, and prepare parts for a press fit.
Additionally, knurled patterning is often applied to plastic mold tooling to form the appearance of knurling in molded components.
Knurling, in a rudimentary cut or edge-hammered form, dates to the earliest metalworking techniques. During the medieval period, as blacksmithing and metalworking techniques advanced, more sophisticated tools and methods for creating textured surfaces emerged.
This included peening with featured hammers, which is essentially identical to modern knurling except that it involves impacts rather than rolling.
The Industrial Revolution brought significant advances and greater repeatability in manufacturing techniques.
Machining tools, including lathes, became more precise and widespread and supplanted the craft skills that had previously been so rare. Early steam engines show evidence of engraved and likely rolled knurling on hand controls.
Swiss watchmakers in the 19th century are credited with crystallizing knurling as a machining process, for precise and decorative patterns on watch components.
In the 20th and 21st centuries, knurling became a universal machining operation. Advances in CNC machining technology further enhanced the precision and versatility of the process.
How Knurling Works?
Knurling is a manufacturing process that deforms a workpiece, or a section of it, to achieve a rough patterned surface.
It is mostly performed on round or cylindrical parts, but in some cases, is performed on flat surfaces as well. The patterns are created by cutting or forming the surface material.
The knurling technique entails utilizing specialized knurling wheels to generate the intended patterns on the surface of a workpiece. This describes how the process is executed:
Step 1: Selecting the Right Workpiece Material.
When pressed by the knurling tools, the material must be malleable enough to move. Aluminum, brass, mild steel, and various plastics are common machining materials.
Harder materials may necessitate the use of specific knurling tools and slower speeds.
Step 2: Choosing the Appropriate Knurling Method.
Hand and machine knurling are the two most common methods of knurling. The former employs a small roller tool that presses against the surface of the workpiece to generate the desired pattern.
The latter employs a lathe to cut the desired pattern into the workpiece. Hand knurling is best suited to softer metals, but machine knurling can obtain finer details in harder materials.
Step 3: Setting Up the Knurling Wheels or Tools.
Knurling wheels are available in various tooth sizes, angles, and materials to suit various purposes. The tooth profile determines the pattern and severity of the knurl.
They are held in place by a knurl holder that is mounted to the work table. The reverse picture of the intended knurl pattern is contained in knurling tool.
Step 4: Properly Mounting the Workpiece.
The workpiece is secured between centers or in a lathe chuck. It must be properly clamped to stop the workpiece from slipping under the knurling stresses.
Step 5: Executing the Knurling Operation.
The revolving workpiece is gently fed with the knurling wheels or tools. To achieve even knurling, perpendicular alignment and constant pressure are essential.
The material surface is then deformed because the wheels or tool are fed continuously into the workpiece while applying constant pressure.
This results in bumps or depressions on a workpiece’s surface. Sharp, high knurls may require multiple passes in tougher materials.
Types of the Knurling Process
The process of creating a knurled pattern on the surface material is done by using knurling wheels or dies. These tools are pressed onto the workpiece, subjecting it to deformation to create intricate designs.
Some parameters to keep in mind before starting the process are pitch, angle, hole diameter (internal knurling), knurl and blank diameter, face width, and grade (teeth per inch).
The knurling process is carried out in two ways – either by hand or through a machine.
1. Hand Knurling.
Hand tools are pressed against the workpiece in order to deform the metal and create specific patterns.
A small roller tool is used to create these indentations on the workpiece. These tools come in different patterns and designs depending on their application.
Hand knurling is a great option for smaller projects as it is more economical to have a knurling tool than a lathe machine.
An example of this is knurling a small metal pin to bite into the diameter of a plastic molding as it requires low precision.
2. Machine Knurling.
Lathe machines made it possible to improve the process of knurling, CNC controlled turning machines have taken this precision and level of control even further.
The workpiece is clamped onto the lathe and a cutter or knurling wheel is pressed onto its surface. By manipulating the machine feed and RPMs, patterns with various dimensions can be created.
The tool chips away material as the workpiece rotates along the lathe, creating a rough pattern. This method is faster and more precise than hand knurling, especially for repetitive projects.
It is essential to have the workpiece at the center of the lathe in order to have a precise output. This method, however, generates a lot of heat from the constant revolution of the workpiece as its surface makes contact with the roller.
Oil or other lubricants are used to prevent the workpieces from flaking, galling, and sticking (accidental welding) to the knurling tool.
Milling machines can be used for knurling but the machines are basically programmed to act like lathes with the aid of Computer-Aided Manufacturing (CAM) software. However, milling machines are suitable for creating patterns on flat surfaces.
Types of Knurling Patterns
There are different types of knurling that product manufacturers use to create desired patterns on workpieces.
#1. Straight Knurling.
Straight knurling makes straight-line and groove patterns on the surface of a workpiece. It usually features intersecting parallel or diagonal lines made by a knurling tool with two hardened wheels with diagonal teeth.
Moreover, many industries create straight knurling on products to give a patterned texture that improves gripping and handling.
Uses and Benefits of Straight Knurling
Decorative Purposes
Straight knurls are decorative patterns that add to the aesthetic appeal of a workpiece’s surface. It is perfect for cylindrical objects like handles and knobs.
In addition, it is suitable for applications such as high-end writing instruments, custom hardware, or jewelry, giving it a stylish look.
Anti-Slip or Improved Grip Functionality
Straight knurling makes roughened texture on the surface of an object to enhance grip for easy object holding and manipulation.
These knurling patterns help to increase friction between your hand and the workpiece, preventing slippage. It is beneficial in applications where a firm grip is crucial.
Alignment and Positioning
This knurling texture sometimes serves as a reference for component alignment and positioning. The patterns function as a visual indicator in aligning and adjusting components properly.
Hence, straight knurling is ideal for equipment or mechanisms that need precise alignment, including fine-tuning mechanism, measurement tools, or optical devices.
#2. Diamond Knurling.
Diamond knurling is another common type that makes small diamond-shaped ridges or indentation patterns on a workpiece’s surface.
It usually consists of crossed-diagonal lines, forming several diamond-shaped projections. However, you can achieve this finish using knurling wheels with teeth arranged like a diamond.
Uses and Benefits of Diamond Knurling
Durability
The diamond knurls make a workpiece more wear-resistant and durable. They commonly apply to machine components, tools, or decorative pieces that experience consistent contact or high friction.
The diamond indentation or texture spreads the pressure and wears uniformly, reducing risks of wear or damage. Therefore, this attribute makes this knurling texture ideal for applications with high durability demands.
Decorative Application
The diamond-shaped indentation is unique and highly decorative. It produces complex and visually appealing knurling patterns on machined parts such as bicycle parts, lighter casings, or personal accessories to achieve an attractive and sophisticated appearance.
Improved Grip
Diamond knurling facilitates better grip in hand-held workpieces by creating several contact points between your hand and the workpiece.
Since the diamond-shaped indentations aid better traction, you can easily grip and manipulate an object with this knurled finish.
#3. Helical Knurling.
The helical knurling technique involves making diagonal lines in a whorl or spiral pattern on the surface of an object. Manufacturers typically use this knurling pattern on cylindrical surfaces, similar to a screw thread.
Uses and Benefits of Helical Knurling
Decorative Purposes
Helical knurling is similar to other types of knurling because it is also perfect for decorative purposes. You can combine it with decorative techniques like plating or polishing to improve your product’s overall appearance.
Enhanced Functionality
Helical knurling enhances the functionality of cylindrical parts like shafts, knobs, and handles. The helical knurled finish allows a firm grip in rotating and operating the machined part.
Thread Formation
It involves creating threads that match certain thread standards on cylindrical items. As a result, it reduces the need for further threading operations, making it a cost-effective and efficient process for specific applications.
#4. Concave and Convex Knurl.
For a concave knurl, teeth on the knurling wheel are curved into the center of its surface. It is employed to feed one area of the workpiece at a time, axially.
A convex knurl is the finest choice for long traverse knurling processes. It features a round contour that allows it to move across the surface of stock easier.
#5. Square and Bev eled Knurl.
Square profile knurls do well in single-location knurling operations, whereas beveled knurls achieve excellence at traversing knurling processes.
When a square profile knurl is moved left or right, the tooth edge has a heavy load. But the angled tooth of beveled knurls removes some load off the tooth edge, allowing it to move across the surface easier.
#6. Right-handed Knurl.
A right-handed knurl creates diagonal knurls that slope to the right. The teeth on these knurls have a 30 ° helix angle.
#7. Left-handed Knurl.
The opposite of a right-handed knurl is a left-handed knurl. It creates diagonal knurls that slope to the left. The teeth on left-handed knurls are also often retained at a 30 ° helix angle.
It should be noted that using left-handed and right-handed knurls together in a two-wheel holder can make diamond patterns.
Materials for Knurling
Knurling is most commonly applied to steel and brass, both of which are suited to the plastic deformation that rolled knurling requires.
Additionally, knurling of steel tooling components will result in knurled patterning of the molded parts that the tool produces.
Roller and cut knurling can be applied to a variety of materials, generally for decorative purposes. This includes: paper, leather, glass, precious metals, hard engineering metals, and wood.
Different Knurling Tools for Knurled Finish
Product engineers use different knurling tools depending on the intended application and desired results.
It is advisable to consider the properties of the chosen material, like ductility and hardness, for excellent knurling results. Here are some of the critical tools used in metal knurling.
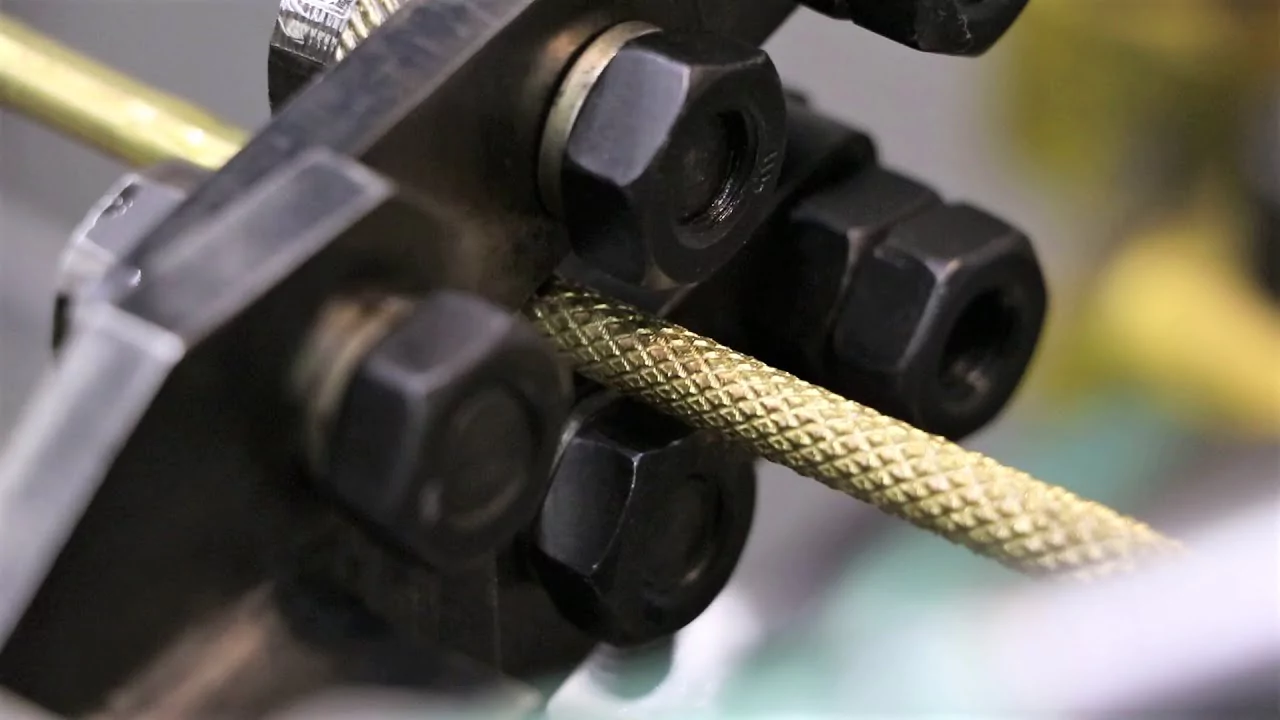
#1. Knurling Wheels.
Knurling wheels are the most commonly used tools for metal knurling. They usually comprise two or more hardened steel wheels with opposing slanting knurl patterns.
These wheels are typically attached to a knurling tool and pressed against the rotary workpiece to produce the preferred knurl pattern.
#2. Knurling Inserts.
These are specialized tools that can be fixed on a lathe for machining. Knurling inserts have a particular knurl pattern programmed to produce the preferred knurled finish.
The inserts are usually available in varying patterns and sizes, made of carbide or high-speed steel.
#3. Knurling Dies.
These dies are tools used in turret lathes or CNC turning services to achieve knurled patterns on cylindrical objects.
Knurling dies are made of high-speed steel, and their knurling patterns cut into the inner surface of an object.
You have to mount them on a knurling tool holder and rotate it against a workpiece to create desired knurled patterns.
#4. Push-Type Knurling Tools.
Push-type knurling tools are hand-held knurling tools that use manual force to make knurled patterns.
The push-type tools typically consist of a knurling wheel attached to a handle which aids its movement along the workpiece’s surface to make the desired knurling texture.
They are compatible with low-volume or manual operations.
#5. Floating Knurling Tools.
This knurling tooling is suitable for making patterns and ridges on contoured or irregular surfaces. These tools adapt to the workpiece’s shape, ensuring a consistent and accurate knurled finish.
The floating tools utilize articulated arms or spring-loaded mechanisms, allowing the knurling wheels to align with the surface contours.
Common Defects of Knurling Operations
Knurled parts have decorative and functional purposes in various applications across industries such as jewellery, furniture, automotive, and aerospace.
However, there are several challenges that product designers encounter in knurling operations.
#1. Under or Over Size.
Manufacturers create knurling patterns on an object reaching a specific diameter or size. Under-sizing happens when the knurling pattern is smaller than the preferred size.
Conversely, oversizing occurs when the knurling pattern is smaller than the intended size.
However, these contradictions arise due to wrong setup, incorrect tool selection, or excessive pressure during knurling operations.
#2. Surface Damage.
Knurling operations sometimes attract surface damages like scratches or gouges, which deform the surface of a workpiece. This usually occurs when knurling with excessive force or a worn-out knurling tool.
#3. Tool Wear.
Knurling tools typically wear out over time, resulting in a decline in their performance and deformation in the knurled metal.
However, the knurling patterns gradually become less defined, and defects like flattened areas and burrs begin to appear as the tool wears continuously.
#4. Poor Pattern Definition.
Generally, knurling patterns must have clear, definite lines and coherent depth. However, it would help to note that inadequate lubrication, incorrect tool geometry, or worn-out knurling wheels lead to poor workpiece pattern definition.
#5. Chattering or Vibration Marks.
Chattering marks are the irregular or meandering pattern that occurs on a workpiece’s surface due to the vibration during the knurling operation.
Common causes of chattering marks include excessive tool pressure, inadequate rigidity, or improper tool alignment in the machine setup.
Tips for Achieving the Best Knurled Finish
Below are some helpful tips for achieving the best-knurled finish for your parts.
#1. Carefully Prepare the Workpiece.
Irregularities, contaminations, or misalignments can hinder the quality of the intended knurling patterns.
Therefore, clean the workpiece, secure it properly, and ensure it has the correct dimensions before beginning the knurling process.
#2. Choose the Appropriate Knurling Tool.
Choosing the knurling tools that fit the desired patterns and material is crucial. Knurling tooling comprises varying tooth configurations, pitches, and patterns. Therefore, using the ideal tool for the material’s hardness and the intended surface finish is advisable.
#3. Apply Lubrication.
Ensure that the knurling tooling and workpiece receive appropriate cutting fluid or lubricant during the operation. It reduces heat generation, friction, and tool wear, producing a smooth, knurled finish.
#4. Optimal Cutting Speed.
Knurling metal at the right speed reduces tool wear while ensuring proper chip formation.
Therefore, it is advisable to determine the ideal lathe cutting tool and cutting speed based on the knurled metal.
Refer to the manufacturer’s directions or the machining recommendations for a specific material.
#5. Adequate Tool Pressure.
Excessive pressure can damage or deform the knurled workpiece, while inadequate pressure can cause a shallow pattern.
You must use the right amount of pressure when knurling a workpiece. However, ensure the tool pressure matches the material and the knurling tool specifications.
Applications of Knurling
Knurling finds use in countless applications spanning every industry where non-slip, gripping, decorative, or locking surfaces are required.
The followings are some of the typical applications of knurling:
#1. Handles and Grips.
Knurling provides extra traction on handles, grips, knobs, and levers so that hands can securely and comfortably grasp them.
Knurled handles and grips are used on everything from hand tools and gym equipment to cabinets, pens, and appliances.
#2. Shafts and Axles.
On rotating shafts, axles, and rods, knurling helps mating parts like bearings, wheels, or gears grip securely without slipping. The knurled surface provides extra friction and a physical locking of parts.
#3. Fasteners.
Bolts, nuts, screws, and other fasteners frequently have knurled surfaces to prevent loosening or slipping during assembly and use.
The knurl bites into mating surfaces, effectively locking the fastener in place. Knurled fasteners are popular for applications that demand maximum gripping power.
#4. Wheels and Rollers.
On conveyor rollers, pulleys, and cylinder rollers, knurling provides extra traction to help materials feed and move efficiently under load without slippage.
The raised knurl pattern aids in gripping and conveying items along the wheel or roller surface. Knurled wheels and rollers are used extensively in manufacturing, material handling, and processing industries.
#. Pumps and Valves.
On plungers, pistons, sliders, and valve stems, knurling creates a non-slip seal to prevent seizing or leakage while allowing movement.
The knurled surface holds pressure and maintains a seal between fluids. Knurled pump and valve components are common in hydraulic, pneumatic, and fuel handling systems where liquids must be contained and metered.
#6. Staircases and Walkways.
On staircases, walkways, ramps, and other foot traffic areas, knurling provides a non-slip safety surface to prevent falls.
The course, sharp knurl pattern maximizes grip for shoes and boots. Knurled staircases, catwalks, and ramps are utilized in industrial settings, public transit areas, and anywhere people may walk on uneven, wet, or slippery ground.
#7. Medical Devices.
Some medical equipment like IV poles, walker handles, and orthopedic devices use knurling to create non-slip, gripping contact points, especially where fluids are involved.
Knurled surfaces allow for manipulation without dropping or losing control of critical parts.
Knurling on medical devices improves safety, handling, and precision during treatment and physical therapy applications.
#8. Aerospace.
In aerospace, knurling is employed on fasteners, hoses, and components that require a non-slip gripping surface, especially in fuel systems or hydraulic lines. The knurl prevents leakage, slippage, or premature disconnection.
Advantages of Knurling
Knurling offers several benefits across different industries and applications:
- Enhanced Grip: Knurled surfaces increase friction, ensuring a secure grip even in slippery conditions. This allows for better control and safety.
- Prevents Slippage: On components like bolts, knobs, wheels, and rollers, knurling helps prevent slippage during assembly or operation. The roughened surface has more friction against mating parts.
- Aesthetic Appeal: Knurling adds visual interest and a unique texture to objects, making them visually appealing.
- Functional Usability: Knurling improves the usability of tools, handles, and components by enhancing their grip and ease of handling.
- Paint Adhesion: Knurling creates more surface area and texture, which can help paint and coatings adhere better to smooth surfaces like plastics or polished metals.
- Identification and Branding: Knurling can incorporate logos, markings, or identification features onto the surface of an object.
- Safety: On staircases, walkways, ramps, and other foot traffic surfaces, knurling provides a non-slip pattern for safety. The raised tracks give shoes extra grip to prevent slipping.
Disadvantages of Knurling
While knurling offers numerous benefits, it also comes with some challenges and limitations:
- Material Considerations: Knurling may not be suitable for all materials. Brittle or delicate materials may crack or deform under the pressure of knurling.
- Weakened Surface: The knurling process hardens the surface but can also introduce stresses that lead to fatigue. Knurling may slightly weaken the surface or reduce impact resistance in some applications.
- Surface Finish: Knurling can leave a rough surface finish, which may not be desirable in applications that require a smooth or polished appearance.
- Precision Requirements: Achieving precise and consistent knurling patterns can be challenging, especially for complex geometries or small workpieces.
- Dimensional Inaccuracies: Aggressive knurling at high volumes can lead to slight variations in diameter or surface distortions. Close tolerances may be difficult to achieve. Secondary operations may be needed to re-size or re-surface knurled components.
- Surface Defects: Improper speeds, feeds, tool condition, or pressure during knurling may lead to poor pattern definition, uneven tracks, or damage like cracks in more brittle materials. Defective knurls require re-working or scraping the component.
Knurling vs. Engraving
Knurling, in most cases, is the roller application of forming tools that plastically distort the target surface to form the required pattern.
Engraving, on the other hand, uses a generally single-point tool to cut pattern features into a surface by material removal.
Before the advent of precision machine tools, it was common for the knurling of components to be achieved by engraving, blurring the differential between the two processes.
Cut knurling is a form of engraving that allows a knurled outcome to be achieved on surfaces that are unsuitable for roller knurling for a variety of reasons.
Knurl Tool Holders: Types and Applications
There are different kinds of knurling tool holders, and they all have specific applications. Here are a few of them:
Bump Holder: Single and Double-Die Configurations.
Bump holders are designed in single-die and double-die variations, with the former capable of accommodating a single knurling wheel and the latter capable of accommodating two wheels.
Moreover, there is a modular configuration available for bump-style knurl holders. This configuration features an easily interchanged tool head, enabling a single or double-die setup without modifying the holder.
Bump holders find applications in both manual and CNC lathes, and they are particularly well-suited for Swiss-type lathes, where compact bump-style holders are the preferred choice.
Straddle Holder: Precision Alignment.
A straddle holder head can accommodate two knurl wheels. The ability to reposition these wheels is provided to work with workpieces of differing diameters.
It is frequently necessary to ensure that the knurl wheels within a straddle holder are properly aligned with the center of the workpiece.
When using two knurl wheels simultaneously, the lines can overlap if both wheels do not exert uniform pressure on the workpiece.
Scissor Holder: Adjustability and Flexibility.
A scissor holder is similar to a straddle holder and can house two knurl wheels. Turning a nut on the holding handle makes it possible to fine-tune the spacing between the knurl wheels.
When employing a scissor holder, it is important not to position the wheels precisely at the center of the stock, as is customary with straddle holders.
Instead, the scissor holder should be slightly offset forward of the center to apply an appropriate amount of pressure effectively.
Swivel Holder: Versatility with Multiple Wheels.
The swivel holder’s chief component can accommodate as many as six knurling wheels.
This enables the simultaneous attachment of multiple wheels to the head, facilitating rapid wheel replacement through a simple twisting motion.
This configuration allows for the convenient deployment of fine, medium, and coarse knurling wheels.